Kenetixquest setup
Jump to navigation
Jump to search
Important Notes

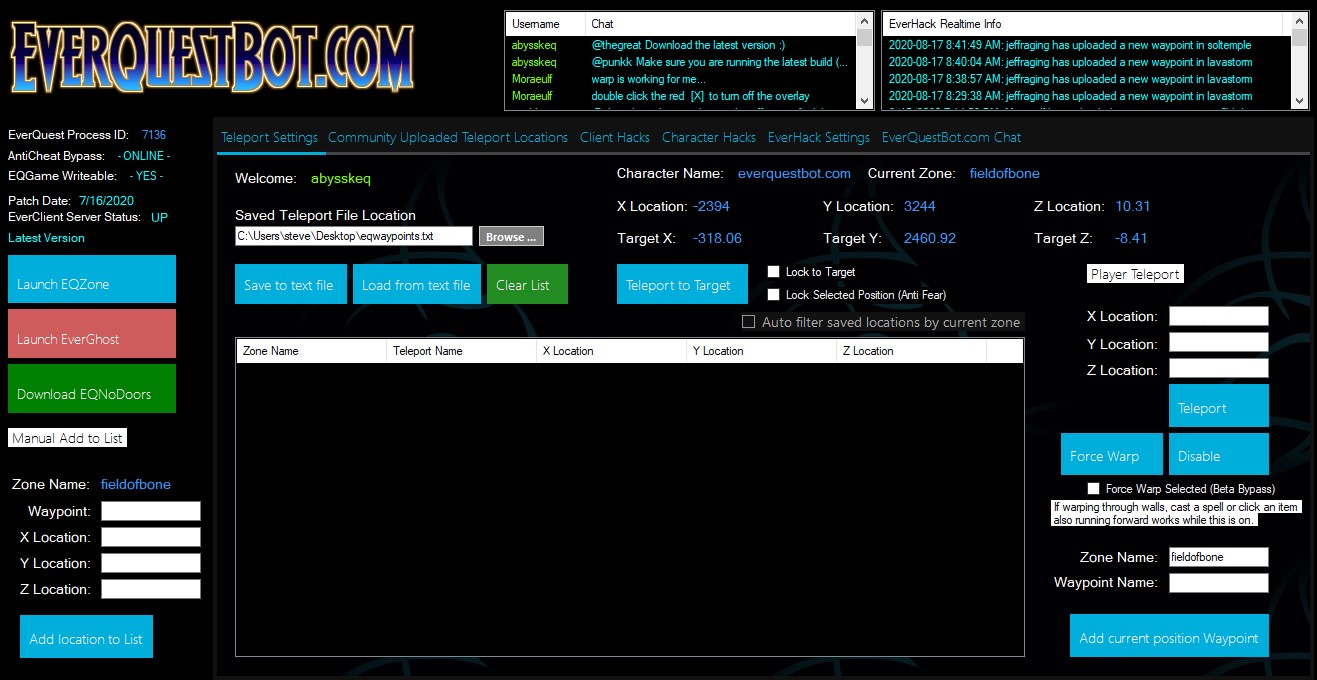
This guide will teach you how to use KenetixQuest for Project 1999 Green, and Blue Servers! KenetixQuest will allow you to do things that the EverQuest client would prevent you from doing. Such as instantly zoning to any connecting zone, warping to any given location in the game, and even giving your character special abilities that would require items, or a spell to achieve!
- Make sure you have the latest version of EverHack downloaded, new versions are always posted in your member section. Which you can access here: DOWNLOAD
First time Setup
First thing you will need to do after purchasing is create a Launcher Alias/Username. This will be used when you upload teleport locations, saving your settings etc. You can register a launcher ID here: REGISTER LAUNCHER ID
- After you have registered a launcher ID you will need to wait for access from an administrator. If you would like immediate access you can visit our discord, and request access. Our discord link is: DISCORD
- Sometimes your AV/Windows Defender will flag KenetixQuest, this is a false positive as KenetixQuest uses an open source obfuscation tool called Obfuscarwhich protects the code. You will need to allow KenetixQuest as an exception in windows defender. Make sure you allow the folder, and not just KenetixQuest.exe. To learn how to give KenetixQuest, an exception in windows defender you can visit here: How to give an Exception.
- Once you have access download the latest build from your member section here: DOWNLOAD run KenetixQuest.exe as an administrator (right click run as administrator). If you don't run as administrator, everything except runspeed modifications will work. Runspeed requires full administrator rights.

- After you have launched KenetixQuest you will prompted to enter your Launcher ID. Go ahead, and then login to KenetixQuest.
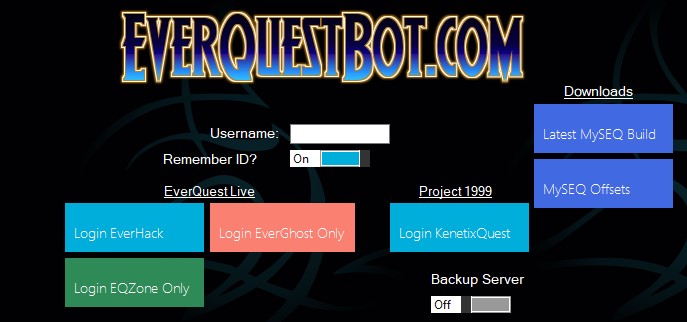
- Once you have logged in, you will have access to KenetixQuest! Now the fun starts!